 Skip to content
 A driver pulls into the shop with a cracked bumper from a low-speed parking hit. The damage doesn’t look serious, but the question always comes up, can this be repaired, or does it need replacement? I’ve handled this situation countless times, and the answer depends on more than just how it looks.
Plastic bumper repair is one of the most common jobs in auto body work. Some fixes are straightforward and affordable. Others require more time, tools, and experience than most people expect.
What matters is understanding the type of damage, the repair process, and where DIY ends and professional work begins. Let’s break it down in a way that helps you make a practical decision.
How To Repair Plastic Auto Bumpers? Quick Answer
Plastic auto bumpers can often be repaired by cleaning the damaged area, sanding it smooth, applying plastic filler or repair material, and repainting the surface.
Minor scratches and small cracks are usually repairable at home with the right tools. Larger cracks, mounting damage, or bumper misalignment typically require professional auto body repair to restore strength, fit, and finish.
Understanding Plastic Bumper Damage
Most modern vehicles use flexible plastic bumpers designed to absorb minor impacts. In my auto repair shop, I see everything from light scuffs to full cracks. The key is knowing what kind of damage you’re dealing with before deciding how to repair plastic auto bumpers.
Common Causes of Bumper Damage
From my experience in the shop, bumper damage usually comes from everyday situations. Parking lot taps, backing into objects, or low-speed collisions are the most common causes. Road debris can also leave scratches or gouges over time.
What this really means for drivers is that bumper damage doesn’t always indicate a serious accident. It often comes from normal driving conditions. Still, repeated minor impacts can weaken the plastic and make future repairs more difficult.
Types of Damage (Scratches, Cracks, Dents)
Not all damage is equal. Light scratches usually affect only the paint layer. Deeper scratches can reach the plastic. Cracks are more serious and often require reinforcement. Dents in plastic bumpers behave differently than metal—they flex, but they don’t always return to shape.
In practice, I evaluate three things: depth, location, and spread. A small scratch near the surface is simple. A long crack near a mounting point is a different story entirely.
When Damage Is Cosmetic Vs. Structural
Here’s the question I ask in the shop: does the damage affect how the bumper holds together? Cosmetic damage includes scratches and minor scuffs. Structural damage involves cracks, splits, or loose sections.
If the bumper still sits properly and isn’t separating, repair is usually possible. If it’s misaligned or weakened, repair becomes more complex. That’s where professional tools and techniques start to matter.
Can You Repair A Plastic Auto Bumper Yourself?
Drivers often ask me if they can handle bumper repair at home. The answer depends on the type of damage and your comfort level with tools. Some repairs are manageable. Others require more experience than most people expect.
Situations Where DIY Repair Makes Sense
DIY works best for minor issues. Light scratches, small scuffs, and shallow surface damage are good candidates. I’ve seen many drivers successfully use a bumper repair kit for these cases.
If the plastic isn’t cracked through and the shape is intact, you can often sand, fill, and repaint the area. These repairs are mostly cosmetic, and the risk is low if done carefully.
When DIY Repairs Are Not Recommended
Cracks, deep gouges, or damage near mounting points are different. I’ve seen DIY attempts fail when the repair doesn’t hold or the finish looks uneven.
Large cracks often need plastic welding or reinforcement from behind the bumper. Without proper tools, the repair may not last. In those cases, a body shop is the safer option.
Tools and Materials Needed for DIY Repair
A basic setup includes:
- Sandpaper (multiple grits)
- Plastic filler or repair compound
- Primer and color-matched paint
- Clear coat
- Cleaning solution
From my experience, the biggest mistake is skipping prep work. Clean and sand properly, or the repair won’t bond well.
How To Repair Plastic Auto Bumpers Step-by-Step

When I train new technicians, I emphasize process over speed. A proper repair follows a clear sequence. Each step builds on the last, and skipping one usually shows in the final result.
1. Cleaning and Preparing The Surface
Every repair starts with cleaning. Dirt, grease, and road residue prevent proper adhesion. I always use a dedicated cleaner before touching the surface.
Once clean, inspect the damage closely. Small cracks may need to be widened slightly so filler can bond properly. Preparation is what determines whether the repair lasts.
2. Sanding The Damaged Area
Sanding removes rough edges and creates a surface the filler can grip. I usually start with a coarser grit and move to finer sandpaper.
The goal is to smooth the area without removing too much material. If you rush this step, the repair will look uneven after painting.
3. Apply Plastic Filler Or Repair Material
This is where the structure gets restored. I apply filler in thin layers, allowing each layer to set before adding more.
For cracks, reinforcement may be needed from behind. That’s something many DIY repairs skip, which leads to the crack returning later.
4. Sanding and Shaping The Repair
Once the filler cures, sanding begins again. This step blends the repair into the surrounding surface.
In the shop, I run my hand over the area to check for smoothness. If you can feel the repair, you’ll likely see it after paint.
5. Priming and Painting The Bumper
Primer prepares the surface for paint and improves adhesion. After that, color matching becomes critical.
Modern vehicles have specific paint codes. Even with the right code, blending the paint properly takes patience. I’ve seen good repairs ruined by rushed paint work.
6. Final Inspection and Drying Time
Before returning the vehicle, I always inspect the repair under good lighting. Small imperfections show up clearly at this stage.
Drying time matters more than most people realize. Using the bumper too soon can damage the finish before it fully cures.
What Does It Cost To Repair A Plastic Bumper?
Cost is one of the first questions drivers ask. The range can vary widely depending on the damage, the repair method, and the shop you choose.
Average DIY Repair Costs
DIY repairs are the most affordable option. A basic repair kit typically costs between $30 and $100.
That covers materials, but not your time. If you already have tools, the cost stays low. If not, it can add up quickly.
Auto Body Shop Repair Costs
In a professional setting, costs usually range from $200 to $600 for standard repairs. More complex damage can exceed that.
Labor, paint matching, and equipment all factor into the price. What this really means for drivers is you’re paying for durability and finish quality.
Factors That Affect Pricing
Several variables influence cost:
- Size of damaged area
- Depth of the damage
- Location on the bumper
- Paint complexity
- Labor time
From my experience, paint matching is often the biggest cost driver. Metallic and multi-layer paints take more time to blend correctly.
Repair Vs. Replacement Cost Comparison
Sometimes repair isn’t the best option. If the bumper is severely cracked or structurally compromised, replacement may be more practical.
Replacement costs are higher, but the result is more reliable. I usually recommend replacement when repair won’t restore full strength.
Choosing A Reliable Auto Body Shop For Bumper Repair

If you decide not to handle the repair yourself, the next step is choosing the right shop. Not all body shops deliver the same quality, and I’ve seen the difference firsthand.
Certifications and Technician Experience
Look for certified technicians, especially ASE or manufacturer certifications. These indicate proper training and standards.
From my experience in the shop, skilled technicians follow consistent repair procedures. That’s what ensures long-term results.
Reading Reviews and Customer Feedback
Customer reviews can reveal patterns. Look for consistent feedback about quality, communication, and timelines.
A few negative reviews are normal. What matters is how the shop handles issues and whether problems are resolved professionally.
Questions To Ask Before Approving Repairs
Before agreeing to work, ask:
- What method will be used?
- How long will the repair take?
- Is there a repir warranty?
Clear answers usually indicate a well-run shop. Vague responses can be a warning sign.
Warranty and Repair Guarantees
A reputable shop stands behind its work. Warranties vary, but most cover defects in workmanship.
This matters because bumper repairs can fail if done incorrectly. A warranty gives you some protection if that happens.
Risks of Ignoring Bumper Damage
It’s easy to ignore minor bumper damage, especially if it doesn’t affect driving. I’ve seen many cases where small issues turn into larger problems over time.
Worsening Cracks and Structural Issues
Small cracks tend to spread. Temperature changes and vibration weaken the plastic further.
What starts as a minor issue can eventually require full replacement. Early repair is usually more cost-effective.
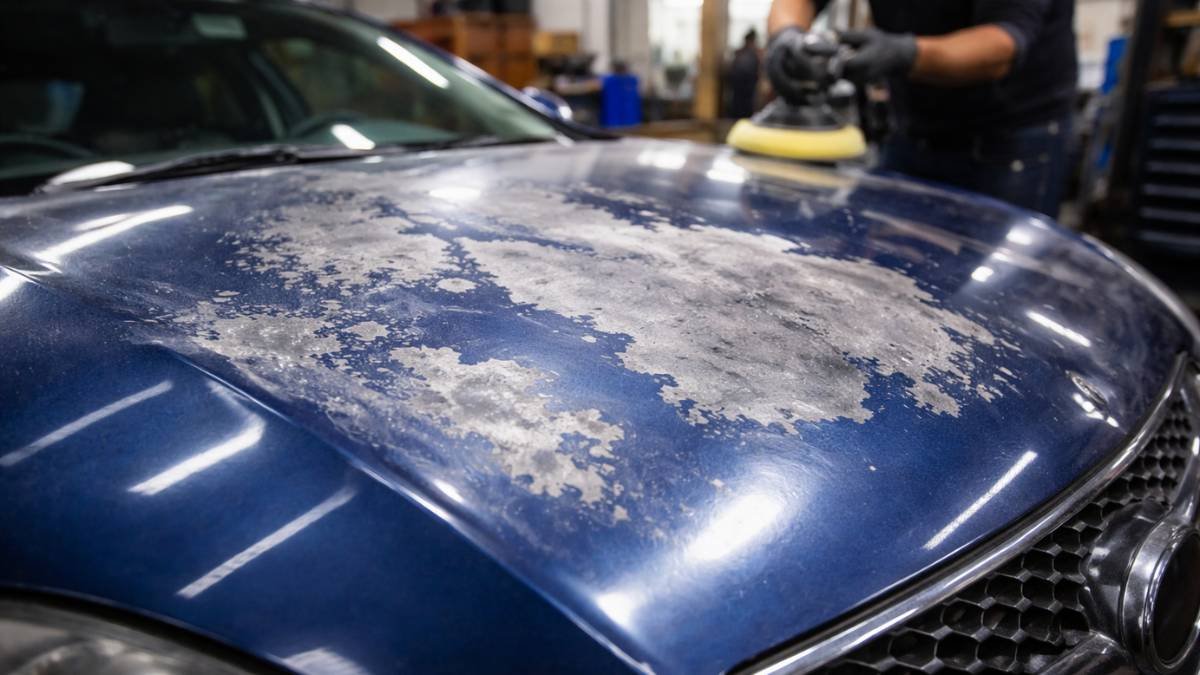
Paint Damage and Hidden Issues
Scratches that expose the underlying material can lead to deeper problems. Moisture can get behind the surface and affect internal components.
This is especially true near mounting points or sensors built into modern bumpers.
Impact On Vehicle Value
Visible damage affects resale value. Buyers notice cosmetic issues, even if they’re minor.
From my experience, a clean, well-maintained exterior makes a significant difference when selling or trading in a vehicle.
Final Thoughts
Plastic bumper repair is often straightforward, but the right approach depends on the type and extent of damage. Minor issues can be handled with basic tools, while larger cracks or structural problems require professional attention.
Understanding the repair process, cost factors, and risks helps you avoid unnecessary expenses and poor results. A careful evaluation upfront leads to better decisions and longer-lasting repairs.


Add your first comment to this post