 Skip to content
 Rust on a vehicle can start small but quickly compromise the body’s strength and appearance over time. Understanding how to fix auto rust spots helps drivers prevent costly damage and maintain vehicle integrity.
Rust forms when metal is exposed to moisture and oxygen, creating corrosion that spreads under paint. Without proper attention, even minor surface rust can escalate into deep structural problems. Repairing rust early preserves resale value and prevents further deterioration.
This guide explains rust formation, identifies damage levels, and provides step-by-step strategies to restore metal surfaces safely and effectively.
By following proven auto repair methods, drivers can protect their vehicle and achieve long-lasting results without guesswork or unnecessary expenses.
Understanding Rust and Its Effects On Your Vehicle
Rust is the result of metal reacting with oxygen and water, creating corrosion that slowly weakens automotive surfaces. It does not appear uniformly and often starts in hidden or vulnerable spots.
Rust spreads when protective coatings fail, exposing raw metal. Moisture, road salt, and scratches accelerate this process, turning minor blemishes into significant damage.
Understanding the different types of rust helps determine the repair approach and prevents improper fixes.
Common Rust-Prone Areas On Cars
Certain areas are highly susceptible to corrosion because they accumulate moisture, dirt, and road salt. Key zones to inspect regularly include:
- Wheel wells – collect water, mud, and debris that accelerate rusting
- Door sills – scratches from entry can expose metal underneath paint
- Undercarriage – often neglected, easily corroded by road salt
- Around trim – moisture can seep under chrome or rubber seals
Signs that rust has gone deeper than the surface include bubbling paint, rough textures, and small holes. Early detection helps prevent more intensive repairs later.
How Rust Affects Vehicle Safety and Value
Rust compromises structural integrity and can make panels brittle, reducing overall safety. Corrosion spreads beneath paint, eventually affecting frame components and supports. Paint deterioration makes the vehicle appear aged and neglected, lowering resale value.
Ignoring rust allows it to grow unchecked, turning minor spots into larger, more expensive issues. Acting quickly protects both the vehicle’s function and its market worth. Repairing rust properly prevents recurring damage and maintains body strength for years.
Also Read: How To Repair Auto Paint Scratches?
Tools and Materials Needed For Rust Spot Repair
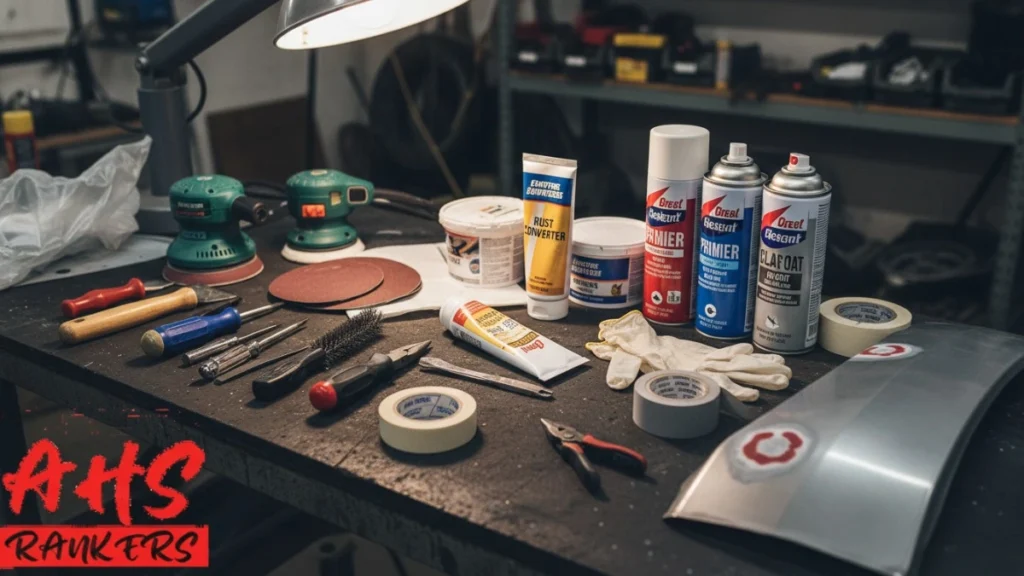
Repairing rust spots safely and effectively requires the right tools, materials, and protective gear before starting any work. Preparing adequately ensures the repair lasts and prevents further damage or personal injury.
Using proper equipment reduces errors and allows precise restoration of affected areas. Understanding what each tool does improves workflow and efficiency while working on automotive metal surfaces.
Preparing Your Workspace Safely
A clean, well-ventilated area is essential for safe rust repair. Dust, fumes, and debris can be hazardous if ignored. Key steps include:
- Ensure adequate ventilation to minimize inhalation of dust and fumes
- Wear safety glasses, a respirator, and gloves for personal protection
- Mask nearby panels and trim to prevent overspray or accidental scratches
- Keep the workspace free of clutter to avoid tripping or tool accidents
Proper safety practices reduce the risk of injury and ensure a cleaner, more professional repair.
Selecting The Right Materials For The Job
Choosing the correct materials determines repair durability and visual quality. Not all products work with every vehicle or rust severity. Essential materials for fixing auto rust spots include:
- Rust converter – stabilizes remaining corrosion and prevents further spread
- Bondo/body filler – fills holes or pitted areas for smooth surfaces
- Sandpaper – various grits for surface preparation and finishing
- Primer – creates adhesion for paint and protects repaired metal
- Automotive paint – color-matched to your vehicle for seamless repair
- Clear coat – seals paint, protecting against moisture and UV exposure
Selecting the right combination ensures the repaired area blends visually while maintaining long-term protection.
Step-by-Step Guide To Fix Auto Rust Spots
Repairing rust spots properly requires patience, careful preparation, and the correct materials. Skipping steps often leads to peeling or recurring corrosion. Following a systematic approach ensures that repaired areas blend visually and remain structurally sound.
This section explains how to fix auto rust spots from start to finish, whether for minor surface rust or more severe corrosion.
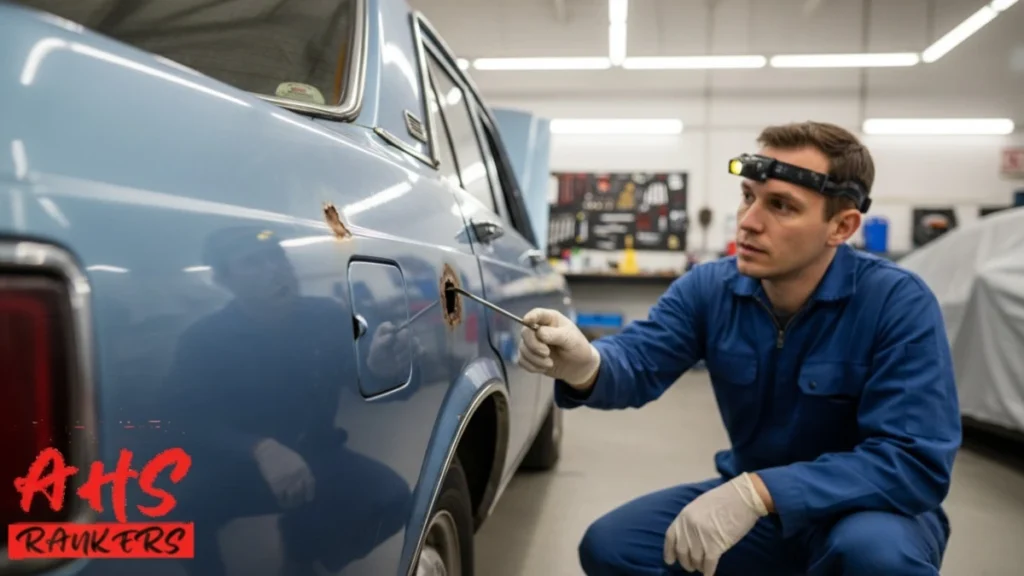
Step 1: Surface Preparation and Sanding
Removing loose rust and paint is the first critical step in any repair. Use sandpaper or an angle grinder to:
- Start with eliminating flaking paint and loose rust particles
- Smooth the surrounding metal for better filler adhesion
- Expose stable metal that can be treated with rust converter
Proper surface preparation ensures that rust does not continue spreading beneath new paint layers.
Step 2: Applying Rust Converter
After sanding, treat remaining rust with a rust converter. This chemical stabilizes corrosion and prevents further deterioration. Application tips:
- Apply evenly to all affected areas using a brush or spray
- Allow sufficient curing time per manufacturer instructions
- Avoid over-application to prevent texture inconsistencies
Rust converter strengthens weakened metal and prepares it for filler or primer.
Step 3: Filling Holes With Bondo Or Body Filler
For pitted areas or small holes caused by corrosion, use Bondo or body filler:
- Mix filler to manufacturer specifications for optimal consistency
- Apply in thin layers to prevent cracking or shrinkage
- Shape and smooth the surface with a plastic spreader
Filling creates a smooth base for primer and paint, restoring the panel’s original contour.
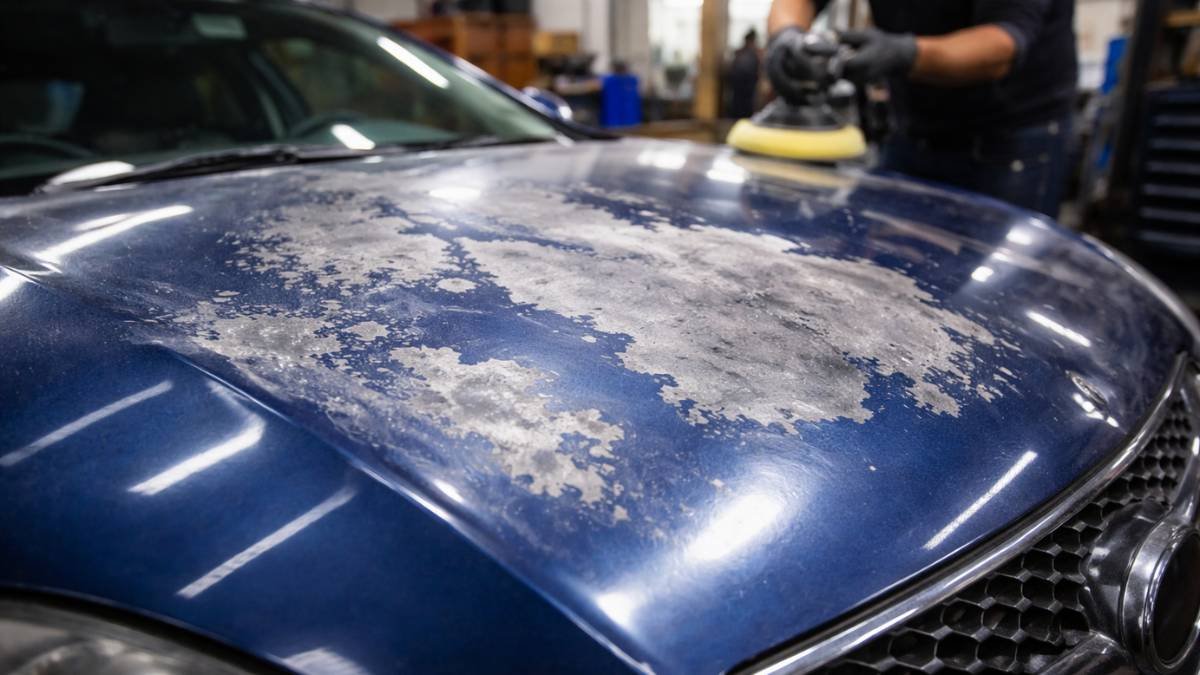
Step 4: Sanding and Smoothing The Filled Area
Once the filler cures, sand it to achieve a seamless finish:
- Begin with medium-grit sandpaper to level the filler
- Progress to fine-grit for smooth blending with surrounding paint
- Remove all dust before priming to ensure adhesion
A well-sanded surface eliminates imperfections and prevents visible bumps under paint.
Step 5: Applying Primer
Primer prepares the repaired metal for paint and protects it from moisture:
- Apply a thin, even coat over the filled area
- Allow proper drying time according to product instructions
- Lightly sand between coats if needed for a smoother finish
Primer ensures paint adheres properly and helps prevent future corrosion.
Step 6: Painting The Repaired Area
Use color-matched automotive paint to restore the vehicle’s original appearance:
- Apply thin, even coats to avoid runs or orange-peel texture
- Feather edges to blend seamlessly with surrounding panels
- Allow sufficient drying time between coats
Correct painting provides a professional-looking finish and protects the repaired metal.
Step 7: Applying Clear Coat
A final clear coat seals the paint and adds durability:
- Apply two or more thin layers to protect against moisture and UV exposure
- Allow proper curing time before handling or polishing
- Lightly polish after full curing for a uniform gloss
The clear coat ensures the repair is long-lasting and resistant to the elements.
Step 8: Inspecting and Maintaining The Repaired Area
After repair completion, regular inspection prevents rust recurrence:
- Check for small chips or scratches and address them promptly
- Clean and wax the repaired panel to add protection
- Avoid prolonged exposure to road salt and moisture
Consistent maintenance preserves both the repair and the surrounding paint.
Also Read: How To Repair Auto Leather Seats?
Advanced Repairs For Severe Car Rust

Some rust spots go beyond surface damage and require more intensive work to restore metal strength and safety. Cutting out damaged sections and welding replacement panels ensures structural integrity and long-lasting protection. These repairs are more complex but necessary for serious corrosion.
Cutting and Replacing Rusted Metal
When rust has penetrated completely, the affected metal must be removed carefully:
- Mark the damaged area clearly before cutting to avoid removing healthy metal
- Use an angle grinder or metal shears to cut along marked lines
- Ensure edges are clean and smooth for proper welding attachment
Replacing metal restores strength and prevents rust from returning in hidden areas.
Welding and Reinforcing The Panel
Welding provides permanent repair for structural components affected by rust:
- Secure the replacement panel and tack weld along seams
- Complete full welds, maintaining metal alignment and panel contours
- Grind welds smooth and prepare for filler or primer
Proper welding restores both structural safety and panel alignment for professional results.
Finishing The Repaired Metal
Once welded, treat the repaired area as a typical rust spot:
- Apply rust converter to any remaining exposed metal
- Fill gaps or uneven areas with Bondo or body filler
- Sand, prime, paint, and finish with clear coat as described previously
This ensures a uniform appearance and long-term corrosion protection.
Preventing Rust and Corrosion In The Future
Repairing rust is only part of the process. Preventative measures significantly extend vehicle life and maintain appearance. Regular inspections, cleaning, and protective coatings reduce the risk of recurrence.
Maintenance Practices That Reduce Rust Risk
Consistent care protects metal surfaces and prevents small spots from turning into major damage:
- Inspect the undercarriage, wheel wells, and door sills for moisture or debris
- Wash and wax panels regularly to protect paint and seal metal
- Address chips and scratches promptly to prevent moisture infiltration
- Apply rust inhibitors or protective coatings to vulnerable areas
- Avoid prolonged exposure to road salt or standing water
Proactive maintenance complements proper repair and keeps vehicles rust-free longer.
Routine Inspections and Early Action
Regular monitoring ensures that small rust spots are addressed before serious corrosion develops:
- Examine seams, edges, and high-contact areas monthly
- Use a wire brush or light sanding to remove early surface rust
- Reapply primer, paint, or clear coat as needed to seal repaired areas
Early detection and action dramatically reduce the effort and cost of future repairs.
Frequently Asked Questions (FAQs)
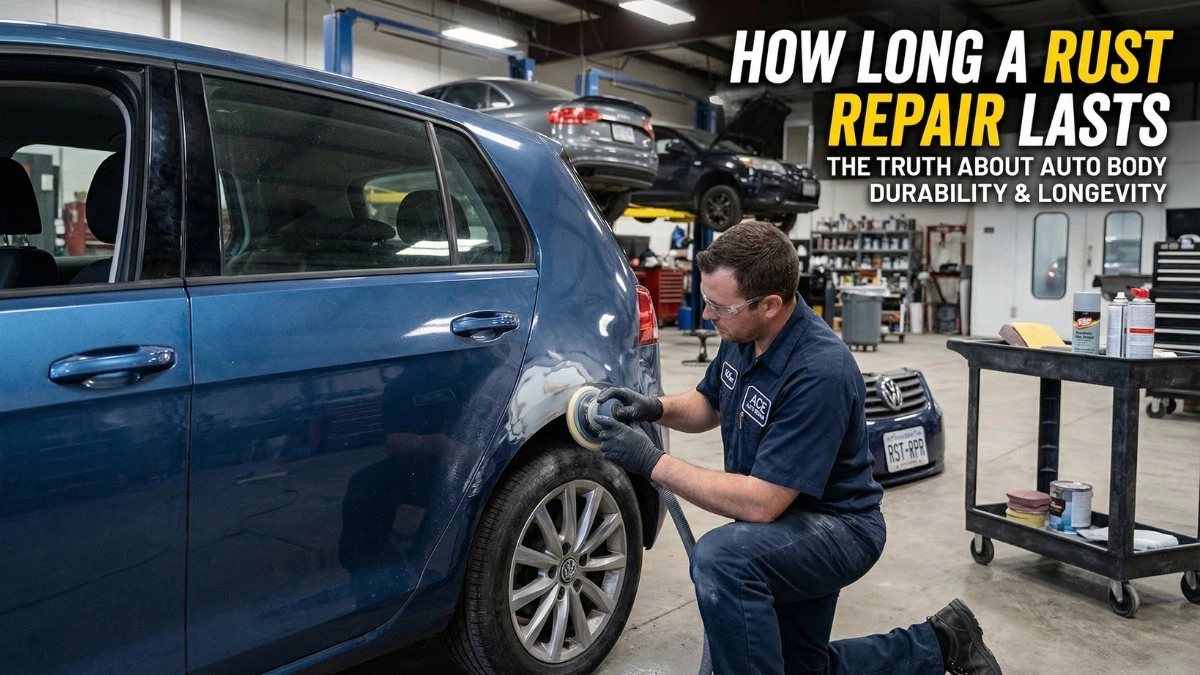
How long does a rust spot repair last on a car?
Properly repaired rust spots with primer, paint, and clear coat can last several years. Maintenance and touch-ups improve durability.
Can I fix rust spots on my car myself?
Minor surface rust can be repaired at home using sandpaper, rust converter, body filler, and automotive paint.
When should I consider professional rust repair?
Severe rust that exposes metal, causes holes, or affects structural components should be repaired by an experienced technician.
What tools are essential for fixing auto rust spots?
Safety gear, sandpaper, wire brush, angle grinder, rust converter, Bondo, primer, automotive paint, and clear coat are necessary.
How can I prevent rust from forming in the future?
Regular washing, waxing, inspecting wheel wells, and applying rust inhibitors reduce corrosion risk and extend vehicle life.
Final Thoughts
Rust damage doesn’t need to compromise your vehicle when addressed carefully and methodically. Knowing how to fix auto rust spots allows drivers to restore both appearance and structural integrity efficiently.
Correct surface preparation, proper use of body filler, primer, and clear coat, and careful maintenance prevent recurring corrosion. Advanced repairs like welding become necessary only when rust penetrates deeply, but even minor rust spots benefit from timely attention.
Regular inspections, protective coatings, and prompt touch-ups ensure long-lasting results. By following proven repair methods, vehicle owners maintain resale value, safety, and confidence on the road.
Rust repair is not about shortcuts; it’s about applying correct materials, using the right tools, and acting proactively to protect metal surfaces.


Add your first comment to this post